Well, while I figure out the layout and discover other things along the way (gonna need a bigger box), I used the plastic delivery box some of the bits came in to get things going.
Holes quickly measured and pushed through with screw driver and scissors, hmm should invest in a hobby drill, but for now...
Buttons quickly pressed through, couple of them wired up. Starting to take shape, remember this is just for me to explore the layout and if things work out I'll use this experience to improve the next version.
I also crimped a load of the wires and tested all the switches, more on that next time, but yeah not sure I'm going to be able to cram everything into this size, I know it looks fairly empty above but with the Pi, LCD, MakeyMakey, cables etc...
Wednesday, January 22, 2014
Saturday, January 18, 2014
Switches and wires
Well, some bits arrived in the post - wires and switches. This is basically everything I need, I think, to take human input and map that via MakeyMakey to functions in Acid-Py on the, erm, Pi.
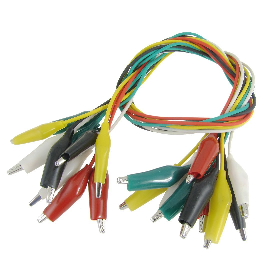
I quickly hooked at some of the 'push to make' switches to MakeyMakey, using the clips. Once I have a prototype I need to worry about soldering but for now I need to be able to connect/move things about freely.
So with the basics proved, I've updated the software on-board MakeyMakey to map every available input (18 in total, afaik) to the keys I've laid out in a spreadsheet which shows what they are going to do in the software that will be running on the Raspberry Pi.
I tested each input quickly on the PC, so far so good. I didn't test every switch though, yet! The process of having the PC correctly recognize the MakeyMakey, get the Arduino software working, then patch/upload updated software was a little interesting; something for a dedicated post sometime.
Anyway, hope you enjoy the pics!
Labels:
acid-py,
groovebox,
makeymakey,
python,
raspberry pi,
sequencer
Friday, January 17, 2014
Acid-Py
Ok, 10 minutes in MSPAINT and the project has a name and logo to be going on with :)
Is this too short for a blog entry? Probably! sudo halt
Labels:
303,
groovebox,
makeymakey,
python,
raspberry pi
Thursday, January 16, 2014
Building a mini sequencer/groovebox
Long time no post. So, I got a Raspberry Pi --- the first thing I did? Get some emulators running to play some old games, cool! But, next thing, of course I need to make it play some beats. So, "project with no name" was conceived, the goal - to build a basic sequencer with the Pi.
I decided to use Python, never used it before so a chance to learn, and I needed to know if it could keep in time, before going lower level. Turns out the PyGame timer is accurate enough for me, so far, and I got it playing a 4/4 kick drum easily enough.
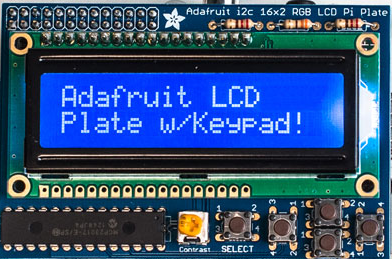
Then I figured I would like to run with a custom display, no screen to cart about, so I got hold of a 16x2 LCD with basic controls, from the helpful guys at Proto-PIC. In not alot of time at all I had a basic drum machine, using the built in controls on the LCD board to navigate and insert/delete kick notes along a 16 step timeline.
Being a fan of the TB-303 and 909 acid combo and having some great sample packs of individual hits, I decided the project would be based around those samples. The 16x2 LCD drove the decision to have 16 steps, and I've decided on 4 tracks, 1 = kicks, 2 = snare/clap, 3 = hats/cymbals, 4 = acid.
But, the clicky cursors on the LCD board while neat, and possibly useful for a future project, made entering notes a bit of a chore and so I expanded the project to include a custom panel using my makeymakey. This can have up to 18 inputs, so my restrictions (which help me creatively, to actually get stuff done) are set.

I decided to use Python, never used it before so a chance to learn, and I needed to know if it could keep in time, before going lower level. Turns out the PyGame timer is accurate enough for me, so far, and I got it playing a 4/4 kick drum easily enough.
Then I figured I would like to run with a custom display, no screen to cart about, so I got hold of a 16x2 LCD with basic controls, from the helpful guys at Proto-PIC. In not alot of time at all I had a basic drum machine, using the built in controls on the LCD board to navigate and insert/delete kick notes along a 16 step timeline.
Being a fan of the TB-303 and 909 acid combo and having some great sample packs of individual hits, I decided the project would be based around those samples. The 16x2 LCD drove the decision to have 16 steps, and I've decided on 4 tracks, 1 = kicks, 2 = snare/clap, 3 = hats/cymbals, 4 = acid.
But, the clicky cursors on the LCD board while neat, and possibly useful for a future project, made entering notes a bit of a chore and so I expanded the project to include a custom panel using my makeymakey. This can have up to 18 inputs, so my restrictions (which help me creatively, to actually get stuff done) are set.
"Insert project name here"
- 4 track, 16 step, acid/303/909 sample sequencer.
- Software written in Python running on Raspbian.
- 16x2 LCD display.
- 18 key inputs (12 will be each note of an octave, leaving 6 to play with for functions)
I have a couple of other ways to extend that with FX but for now I need a prototype before getting too carried away. Ordered about 20 switches and 40 cables online, on their way here now. Meanwhile, back to the software...
Labels:
303,
909,
groovebox,
lcd,
makeymakey,
python,
raspberry pi,
sequencer
Friday, February 1, 2013
Marauder - first LSDJ track (GameBoy)!
Hi,
After selling my EMX I put some of the money into equipment to make my first chiptunes.
So, sharing my first LSDJ track, written using original GameBoy hardware!
Comments/listens/follows welcome as ways :)
Cheers,
LW.
Sunday, June 3, 2012
Distortion
Pedal ordered !! This is to twist the MSSIAH Bassline. Came 2nd in best 303 distortion pedal test, half the price of first place plus I don't have a real 303..anyway, should be fun.
Friday, June 1, 2012
We have liftoff !
Well, good news, basic 303 jam mode working! Drum machine starts and syncs MSSIAH Bassline, and Spin Doctor custom patch lets me change patterns on the fly in time and change the cutoff frequency. Need to extend the midi map to cover the other controls like res, pitch etc but this is a good start, and tests/involves all the main bits of kit. Didn't use a mixer as the RY8 has a line in :)
Subscribe to:
Posts (Atom)