Showing posts with label lcd. Show all posts

Tuesday, February 25, 2014

New image

(Note: old post, published late, reference only)

Right, well, as Acid-Py is coming along I need to get it running on it's own SD card. I've hacked around on my 'main' SD card and I'm concerned I don't know how to do this from the ground up and I'd rather keep Acid-Py related stuff on it's own card that auto loads Acid-Py up, that kind of thing.

Also I want to set up a backup card and image it, that kind of stuff, I've been backing up the source code with WinSCP, but I need an image backup especially as Acid-Py now has auto load and shutdown, I think it's implemented in a safe way, but I heard about SD cards getting corrupted accidentally so better safe than sorry.

So, documenting the steps from the ground up, for my reference, but others may find something useful :)

Base install

Download and install the Raspbian OS to a new SD card

Download 2014-01-07-wheezy-raspbian.zip from:
http://www.raspberrypi.org/downloads

Prep the SD card and install the image using this guide:
http://elinux.org/RPi_Easy_SD_Card_Setup

Config bits, part 1 (on the PC)

Headless setup, so plug into router and connect with putty:
Check/find out the IP address using IP scanner

My putty profile has a few things disabled to make curses/tty work, esp. with numeric pad
Disable application keypad mode
Disable remote-controlled terminal resizing
Disable remote-controlled window title changing
Deselect X11 forwarding

Config bits, part 2 (on the Pi)

Login and run 'sudo raspi-config':
Expand Filesystem
Do User Password stuff
Exit and 'reboot now'

Login and check filesystem has expanded and we've got an IP address:
df -h
ifconfig

Update the distribution:
sudo apt-get update
sudo apt-get upgrade

Update the firmware:
sudo rpi-update
sudo reboot

Acid-Py and dependent stuff

Acid-Py

Copy over the source code and sounds using WinSCP

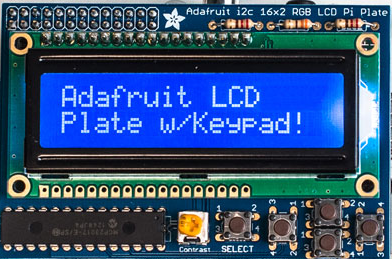
Adafruit i2c 16x2 LCD Pi Plate

sudo /etc/modules and add:
i2c-bcm2708
i2c-dev
sudo reboot

Python

SMBUS Python modules needed to talk to LCD:
sudo apt-get install python-smbus

Auto Login

sudo nano /etc/inittab
comment out "1:2345:respawn:/sbin/getty --noclear 38400 tty1"
add "1:2345:respawn:/bin/login -f pi tty1 </dev/tty1 >/dev/tty1 2>&1"
(note: won't auto-login putty session but does for standalone mode)

Start-up script to launch Acid-Py

Create acid_py_prompt.sh:

#!/bin/bash
echo "Enter . to run Acid Py, anything else to exit"
read myinput
if [ "$myinput" = "." ]
then
        echo "Start Acid-Py"
        sudo python acid.py
fi
        echo "End."
exit 0

Set to executable:
chmod +x acid_py_prompt.sh

Run that script at start-up:
nano ~/.bashrc
add "cd AcidPy" and
add "./acid_py_prompt.sh" to the end

After testing, create a backup image:
win32diskimager
name your image file
be sure to select the right input device (your SD card)
press "read"

Useful Links

Adafruit LCD
http://learn.adafruit.com/adafruit-16x2-character-lcd-plus-keypad-for-raspberry-pi/usage

Future?

overclock in favour of CPU (headless)

Monday, February 17, 2014

On the case...

Ok, so while I want to get everything contained in one box at the end, I'd like to keep the main parts as self contained components, within reason; so I picked up a wonderful extension to the Pibow case on eBay which gives extra protection to the LCD and seals the Pi and LCD together nicely.


I also ordered a case for the MakeyMakey, long overdue as I was always very careful handling the board directly, but now I can use it and not worry too much about damage.


This clear case also leaves all the various points exposed. Ironically I may not be using the MakeyMakey in this project (it has many other uses so it isn't a waste), I'm starting to favor a USB numeric keypad to get around the whole pain and size of housing cables and switches everywhere, as fun as that's been, it's getting in the way now.


Friday, February 7, 2014

It's alive!

Well, first prototype is complete. Below is the rather larger than planned controller, the Pi with LCD running the software, and a speaker, all connected up and running together for the first time.


Close up of the software, plenty of refinement to be done, but the basic UI does it's job, shown here the top row is the current track and you can see a bunch of notes in there. The line underneath is a summary of track, buffer, octave and a few other things, really just a debug output for now but you get the idea.


Ah the delivery box turned controller in all it's hacked-together glory. Well, this taught me roughly what controls I need, how they might hang together, that push-to-make works fine with makeymakey and a bunch of other things about crimping and cables. I'm not sure I'm going to progress with these chunky buttons for the next revision.


Thursday, January 16, 2014

Building a mini sequencer/groovebox

Long time no post. So, I got a Raspberry Pi --- the first thing I did? Get some emulators running to play some old games, cool! But, next thing, of course I need to make it play some beats. So, "project with no name" was conceived, the goal - to build a basic sequencer with the Pi.


I decided to use Python, never used it before so a chance to learn, and I needed to know if it could keep in time, before going lower level. Turns out the PyGame timer is accurate enough for me, so far, and I got it playing a 4/4 kick drum easily enough.


Then I figured I would like to run with a custom display, no screen to cart about, so I got hold of a 16x2 LCD with basic controls, from the helpful guys at Proto-PIC. In not alot of time at all I had a basic drum machine, using the built in controls on the LCD board to navigate and insert/delete kick notes along a 16 step timeline.


Being a fan of the TB-303 and 909 acid combo and having some great sample packs of individual hits, I decided the project would be based around those samples. The 16x2 LCD drove the decision to have 16 steps, and I've decided on 4 tracks, 1 = kicks, 2 = snare/clap, 3 = hats/cymbals, 4 = acid.


But, the clicky cursors on the LCD board while neat, and possibly useful for a future project, made entering notes a bit of a chore and so I expanded the project to include a custom panel using my makeymakey. This can have up to 18 inputs, so my restrictions (which help me creatively, to actually get stuff done) are set.


"Insert project name here"
  • 4 track, 16 step, acid/303/909 sample sequencer.
  • Software written in Python running on Raspbian.
  • 16x2 LCD display.
  • 18 key inputs (12 will be each note of an octave, leaving 6 to play with for functions)
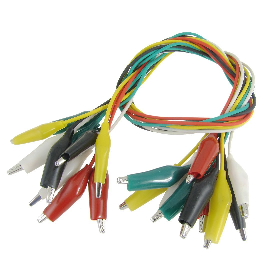
I have a couple of other ways to extend that with FX but for now I need a prototype before getting too carried away. Ordered about 20 switches and 40 cables online, on their way here now. Meanwhile, back to the software...